Normally when people ask me about my New Year’s resolution, I’ll say something sarcastic like, “I resolved to never allow clowns into my house.” This year, however, I decided to try to make as many of my own cleaning and beauty products as I could. While some of the facts about scary chemicals are debatable, I think we can all agree that this route is vastly more economical and kinder to the environment. Luckily for this busy medical student, most homemade household cleaners and basic beauty supplies come from grocery store ingredients, do not require a huge time commitment, and are practically fool-proof. I’ve been slowly replacing things as we run out and here is what has worked for me so far:
Vinegar
This stuff is basically magic and ridiculously cheap at your local grocery store. Just put it in a spray bottle and go to town! It’s nontoxic (so it’s safe for the kitchen countertops and those with pets or children) and it sanitizes (so it’s good for the bathroom). I have been cleaning with plain white vinegar for the last seven years, and the only complaint is that the house smells like a pickle jar after I’ve cleaned every horizontal surface with a spritz of vinegar. Thanks to this post, I am currently infusing my own vinegar. It’s been about a three weeks and I just checked the jar: it smells deliciously of citrus and barely like vinegar. I’m going to give it another week though, just to be extra sure that the citrus scent sticks around.
Baking Soda and Liquid Castile Soap
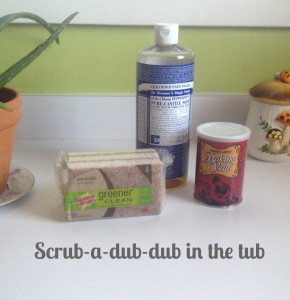
I hate cleaning the bathtub. I hate sticking my face into noxious bleach fumes and how my hands always burn afterwards. Then I discovered this wondrous little combination! Take a bowl, add some liquid castile soap , and then add enough baking soda to make a paste. The amount of paste you need with vary depending on the size of your tub and how dirty it is. Splash some water around the tub to get the sides damp (or do this process after a shower or bath when the sides are already damp!). Take a basic sponge and scrub the paste all around the tub: work those biceps and forearm muscles whose names I never can get straight! Give it a few minutes, then rinse. Prepare to be amazed. This also worked wonders on my stainless steel kitchen sink. Plus, instead of a weird cleaning chemical smell — you know the one — my house smelled like Dr. Bronner’s peppermint castile soap.
Laundry Detergent
I have had great success with this recipe! I used a bar of Dr. Bronner’s almond soap (which smells delicious, but not overpowering) and even threw in a cup of the OxyClean. The trick for my clothes is to put the detergent in (before the clothes) as the warm water is running, and then switch over to cold water. For extra stinky clothes, I’ve been tossing in a few tablespoons of white vinegar — no sweat or armpit stains on my t-shirts!
Wool Dryer Balls
I use this specific brand. Thus far they have worked very well: my towels and sheets are fluffy and soft as ever; the dryer sounds very thunderous, which I find entertaining. The best part is not having to buy dryer sheets! The clothes get static in dry winter weather, but it doesn’t bother me. Honestly, I hang dry most of my clothes, so pretty much only sturdy cotton items (towels, t-shirts, pajama bottoms, bedsheets, most of my fiance’s clothes) go in the dryer here.
Oil Cleansing
I know it sounds counter-intuitive, but washing my face every night with oils and honey has made my skin prettier than it has ever been. And no weird breakouts! The key is finding the right oil for your skin type.
First I rinse my face with warm water. Then I combine equal parts honey (just straight from the container) and face oil in my hand and rub it on my wet face for a couple minutes (nightly face massage, what’s not to love?). Then I wet a washrag with super hot water and place the rag on my face to steam for about 30 seconds before wiping away the oil and honey — it comes right off, leaving behind ridiculously soft and happy skin.
The blend that works for me is grapeseed oil + vitamin E oil + jojoba oil + tea tree oil (pictured above), but I generally don’t have acne problems or particularly dry or oily skin. If you have oily or acne-prone skin, I would suggest using castor oil in your blend. My little sister has reported incredible success with coconut oil (visible change in her acne scars). I have heard people say that gives them pimples, but it may work for you. This is a helpful post I looked at when I was starting out.
Body Lotion
Ingredients: Coconut oil + vitamin E oil + jojoba oil + tea tree oil.
Melt coconut oil in a small pan in the stove. Pour in any other oils you want to add. Pour into desired container and allow to solidify overnight. I use it all over after every shower and my skin is very soft and moisturized!
Now, this isn’t going to be smooth body lotion like the kind from the store; it’s going to be pretty much the same consistency as regular coconut oil. But, it is easy to scoop out a little with your finger and will quickly melt from your body temperature. Heads up: a little goes a long way—use too much and you will be oily.
If you are looking to make something with a more traditional lotion texture, try this recipe. I would like to try it when I have time to assemble the necessary ingredients!
Making my own products has proved to be very enjoyable and rewarding; not only for the obvious financial and environmental benefits, but my house genuinely smells better and my skin really is softer and prettier. It really doesn’t take a lot of time, pinky promise. This might not work for everyone, but if I can do it in the middle of second year of medical school, you can give it a shot. Join the hippies, we have cookies!


